Subscribe To Emails
Subscribe to the YourCotton mailing list to receive updates on new arrivals and promotions (about once every 6 weeks)!

Sewing socks can be daunting for many sewers, especially if you’re a beginner. From the heel turn to adding elastic and finishing the toes – where do you start? With just a few tips, tricks, and supplies from your local store or online shop, sewing socks isn’t so scary! This article is designed to give you an overview of all the steps needed to complete this task confidently. Get ready to learn how to sew socks with ease!
If you’re ready to take on a new project and sew your socks, buying fabric or repurposing old clothes into cut fabrics is an easy way to get started. The best materials for this project are fabrics like cotton, polyester, or linen that contain a small percentage of spandex – just make sure to check the label!
Old sweaters, shirts, and leggings work great as long as they have some stretch, which is essential when making your favorite sock-sewing patterns. Be sure the fabrics are 24 inches by 24 inches to create a proper fit when you’re finished. Making your socks may initially appear daunting, but creating something just for yourself and having it fit exactly how you want feels fantastic! Give it a try today and discover the joys of DIY-ing favorite socks!
If you want to make your socks, begin by finding a sock pattern to use as a template. Place the sock on the fabric and use a pair of fabric scissors to cut around it. Make sure to cut about 0.39 inches away from the sock, ensuring that the sock is slightly larger than the sock pattern. Do this process twice in total to create two sock pattern pieces. With this easy method, you can make your socks for a customized and perfect fit!
Crafting the perfect pair of DIY socks is a cinch with this simple technique. Once you’ve gathered the necessary materials and created each sock’s cut-out, start by placing the cut-out firmly onto the fabric. With fabric scissors, carefully cut around the entire sock, and be sure to keep it as close to its outline as possible so that your finished product will fit your foot size accurately.
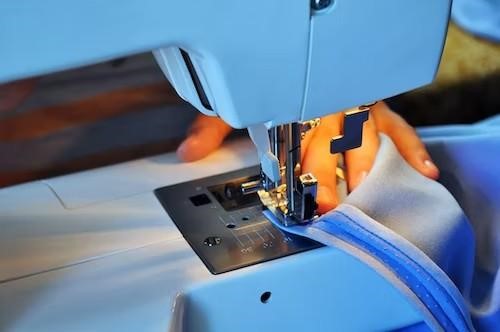
As an extra measure, remember to leave a small seam allowance before repeating this step with the second cut-out. Use sharp kitchen scissors if you don’t have fabric scissors. After both socks are neatly trimmed, all that is left for you to do is stitch them together using your sewing machine or preferred stitching method.
Look no further if you want to create unique sock patterns using leftover scraps from your sewing projects! Place one cut-out sock with the patterned side of the fabric facing upward on a flat surface, then stack the other sock with the patterned side facing down on top.
This simple method allows for two sock patterns to be created in just a few steps. With creativity and an appropriate sewing machine, you can make extraordinary sock patterns that will make all your friends jealous! Follow this simple process to create one-of-a-kind sock patterns that will let everyone know you made them by hand.

Sewing your socks is a great way to customize them around your foot size and style. Pin the fabric's top and bottom together using a sewing machine and a sock pattern before beginning the stitching process.
To keep everything in place while sewing, use sewing pins or thin needles by carefully placing them horizontally at the top of each sock. This will help ensure that everything stays in the right position while you complete your personalized pair of socks.
Sewing around the edges of socks with a zig-zag stitch elevates them from plain to exceptional. Whether using a sewing machine or stitching by hand, it's easy to get great results. With the machine set to its zig-zag stitching wheel, start at the top of the sock and work your way down one edge before curving around the foot and then up over the other edge.
When it comes time to cross over the foothold, make sure you go around it instead – otherwise, you could end up with a very uncomfortable sock! Finally, remember to backstitch at the beginning and end so that those all-important stitches won’t unravel over time.
If you are looking for a way to secure your sock seams, a straight stitch over the zig-zag stitch is an option. To do this, use your sewing machine and adjust it so that it creates straight stitches. Then, sew around the edge of your sock and the foot seam using a straight line. Place the straight stitch directly on top of the zig-zag seam for optimal reinforcement.
Once you have sewn everything together, cut off any excess or loose threads with scissors - this will ensure that they don't end up irritating once you wear the socks. Sewing with regularity and precision is critical when reinforcing seams such as these!
Turning your sock inside out can be daunting for first-timers, but it is quite simple! To finish up your sock, grab the toe and carefully pull it through the ankle part of the sock. Doing this will ensure that all the seams are tucked away, and your socks appear perfect from every angle. For best results, hand wash your socks to keep them in stellar condition for longer. Thoughtful moves like this will pay off in the long run, as you can enjoy well-made socks even more.
If you're looking for a fun and challenging sewing project, why not try making socks? With this Sewing Socks 101 guide, you'll be able to sew a pair of socks that looks great and feels comfortable to wear. Give it a try today!