Subscribe To Emails
Subscribe to the YourCotton mailing list to receive updates on new arrivals and promotions (about once every 6 weeks)!
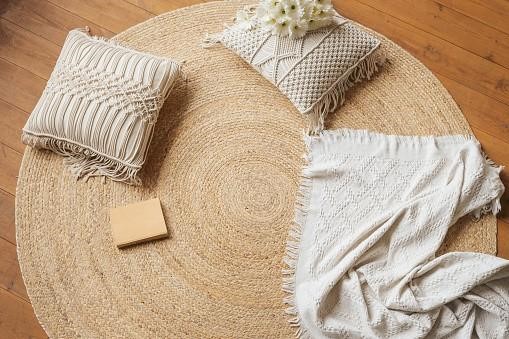
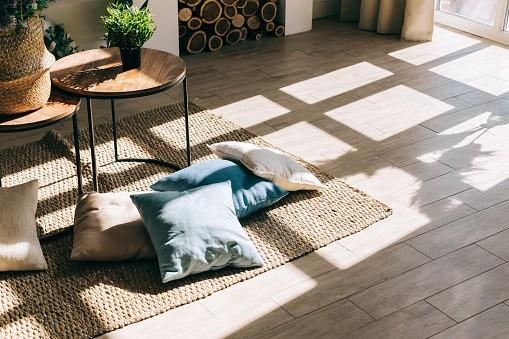
Creating an inviting and cozy space is important for everyone, as a home should be a place of refuge from the world. Floor pillows are one way to achieve this cozy atmosphere and can instantly lift the character of any room. But store-bought floor cushions are expensive. Why spend money when you could make your own? This tutorial will guide you through making a stylish pillow with just a few simple steps – no sewing required! With your unique design specifications, materials, colors, and sizes at your disposal, there's no limit to what kind of custom floor cushion you can create that perfectly fits both your décor and comfort preferences. So let’s get creative!
For a DIY floor pillow tutorial, you will require the following things:
- Large needle for finishing in blanket stitch and Beige tapestry wool
- Cloth
- Iron
- Fabric scissors
- Sewing machine
- Needle and white thread
If you want to get crafty with giant floor pillows, one of the most important steps is choosing the suitable indoor-outdoor fabric. Durability and ease of cleaning should be at the top of your priority list when making a DIY square floor cushion that will get lots of use.
Cotton canvas or denim can make great choices because they wear well and are easy to wash. On the other hand, if you want colorful jumbo floor pillows, heavier fabrics like velvet or corduroy can give you a touch of luxury while still standing up to wear and tear. No matter what fabric you choose, just make sure it will last!
If you want to create oversized floor pillows that are comfortable and long-lasting, it’s important to consider the fill. A polyester fiberfill is a great option for oversized floor pillows that will see regular use, as it’s simple to maintain and holds its shape more easily than other materials. For a plusher experience, opt for a down or feather fill instead.
Remember that these oversized floor pillows may need occasional fluffing to keep their shape intact. Whichever type of oversized floor pillow is your preference, outdoor fabric is always a good choice when you sew your oversized floor pillows with unique colors and designs.
Creating a cozy reading nook with sewing floor pillows is a great way to add extra comfort and style to the space. But when it comes to sewing the pillows, it's important to ensure the seams are secure so they stay together no matter how much you snuggle up in them.
A serger is the best machine for sewing floor pillow projects, as its strong stitches keep your pillow intact for years. However, if you don't have access to a serger, you can still sew up your cushy creation using a regular sewing machine with a zig-zag stitch or reinforced seams made of bias tape. With careful crafting and attention to details like seam security, sewing floor pillows is an easy project that gets beautiful results.
Installing an invisible zipper may seem intimidating, but it's quite simple. All you need is a regular sewing machine, an invisible zipper, and an invisible zipper foot. First, sew the side seams of your pillow project together.
Then, press the seam open and pin the invisible zipper along one side of the opening. Finally, use the invisible zipper foot to sew it into place - this will help keep your stitches hidden on the right side of the fabric. In no time, you'll have a cushion with a professional-level finish that's easy to remove when it needs to be washed!
Adding piping or binding to a floor pillow can give it a much more finished look and even help conceal any minor stitching mistakes. For both techniques, you must sew the pillow cover together using a regular sewing machine before pressing the seam open.
To add piping, you should pin the piping cord along one side of the opening and then use a special piped foot on your sewing machine to stitch the cord down; this will prevent any stitches from showing up on the right side of your fabric. To add binding, start by pinning binding tape around one side of the opening and then use a special binding foot to ensure all stitches stay hidden. Getting these two details just right can make a huge difference!
With just a few basic cutting and sewing skills, you can make this DIY cushion/floor cushion project in no time. It's easy to complete with our step-by-step instructions! The result is a smart and wonderfully soft floor cushion.
Step 1: Create two identical pieces by folding the fleece or blanket in half lengthwise, then cutting it.
Step 2: Trim off all of the excess fabric around the edges (including any simple satin folds). Stack both pieces and securely stitch them together along three sides at a distance of 2 cm from their edge.
Step 3: To complete the seams, snip across all four corners, then turn and tuck inside. Flatten with iron while a damp cloth is positioned underneath to safeguard your fleece from direct heat.
Step 4: Utilize tapestry wool to string the large needle and craft a blanket stitch on all three closed sides.
Step 5: Position the cushion pad inside and then stitch up both sides of the opening. Proceed to complete your blanket stitch along this seam for a secure finish.

So there you have it, everything you need to make your floor pillow! With a few simple supplies and time on your hands, you can create a custom piece of cozy home decor that will become one of your favorite pieces. Will you be trying out this project? Let us know in the comments below or tag us in a photo of your finished product – we can’t wait to see what YOU come up with!