Subscribe To Emails
Subscribe to the YourCotton mailing list to receive updates on new arrivals and promotions (about once every 6 weeks)!

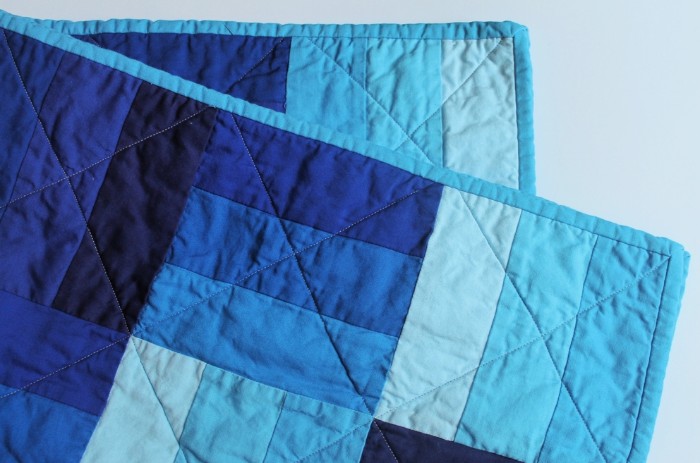
Mitered quilt corners are not only a great way to create an eye-catching quilt design, but they can also make your work look professional and polished. Quilting is an art form that requires attention to detail and mastery of certain techniques for the finished product to be aesthetically pleasing. In this comprehensive guide, you’ll learn all about mitered quilt corners — from the basics of how they’re constructed all the way through to advanced tips and tricks, which will take your quilts from amateur to a masterpiece in no time.

Mitered corners are the perfect way to finish off a quilt. They create an angle that looks amazing and is both strong and beautiful. Perfect mitered corners also add an extra layer of design, creating a unique look that sets your quilts apart from others. Quilt binding is the perfect way to frame the mitered corners, giving your quilt a professional finish. Mitered border corners also make it easy to add a unique look to any quilt without having to sew complex patterns. Binding strips can be cut in any shape or size to create the perfect mitered corner. Quilt edge finishes also create exciting patterns around the mitered corner.
When selecting fabrics for a mitered corner quilt, consider choosing two or three coordinating colors or patterns to make the most of your project. Make sure the fabrics you choose are also similar in weight; this will help ensure that the seam allowance is even when sewing them together. In addition, consider pressing each fabric before cutting, as this will help reduce fraying and keep seams neat.
Here are the steps you need to follow to miter a quilt corner like a pro:
1. Start by laying out the first fabric and measuring 2 inches from one corner. Draw a line with a ruler or quilter's square to mark the spot.
2. Cut along this line to create the mitered corner. Do this for each piece of fabric, making sure all pieces have the exact measurements for an even seam allowance.
3. Pin each piece together at one end, then sew them together using a ½ inch seam allowance. Ensure you backstitch at the beginning and end to keep your seams secure.
4. Press your seams open after beginning sewing and trim any excess fabric if needed.
5. When finished, fold in half on the sewn mitered corners to look like a triangle and press.
6. Finally, top stitch around the mitered quilt corner to keep it secure.
Here are a few tips to help make sure your miters are perfect every time:
-Use a rotary cutter and ruler to ensure accuracy when cutting the fabric.
-Pin in place before drawing the miter line.
-Lay out your pieces on a flat surface while stitching and pressing. This will help keep the corner from getting stretched or distorted while you’re working on it.
-For bulky quilts with multiple layers, use lightweight fusible interfacing on the backside of each corner piece to reduce bulk and create a crisper raw edge.
-If your miters aren’t turning out perfectly, try adjusting your stitch length to make sure it’s consistent throughout the seam. A shorter stitch length will create more stability in your corners but may take longer to sew.
-Finally, don’t forget to press those mitered corners! This will help them stay crisp and neat in your finished project.
Finished quilt corners can add a beautiful and unique touch to any quilt. With a few simple steps, you can create unique mitered corners that will make your quilts look professional.
Using a mitered corner in your quilt has several advantages that can help create beautiful, precise results. A mitered corner helps to eliminate bulk and gives the quilt a professional, finished look as it eliminates any excess fabric at each corner of the quilt top. It also allows for the precise piecing of blocks to achieve straight lines, sharp corners, and points for a crisp foundation for any intricate designs that may be incorporated into your quilt.

Additionally, this method can save time since smaller pieces need not be cut or sewn together separately to achieve the desired effect. Finally, by eliminating extra material from the raw edges of the quilt top, you can maintain a consistent width throughout its entire border length while still achieving the desired look. All these benefits combined can help you create a stunning quilt that will be admired for years. Double-fold binding can also be used to finish your mitered quilt corner, allowing you to achieve a professional and polished look.
Yes, there are some downsides to using a mitered corner in your quilt. First, the angle of the corner can be difficult to get just right. If it’s too acute or obtuse, it won’t look right and will detract from the overall appearance of the quilt. Additionally, you must be careful when pressing your fabric pieces into place so that you don’t stretch them out of shape as you go along. This could lead to an uneven finished product with less-than-perfect seams. Lastly, sewing the corner together, takes more patience and skill than working with traditional 90-degree corners due to its angled nature. However, with a bit of practice and instruction from an experienced quilter, it’s possible to master the mitered corner and produce beautiful quilts with stunning mitered corners!
Mitered quilt corners are a beautiful way to finish off any quilting project. With the right fabric selection, precise cutting, and proper pressing, you can create mitered corners that will make your quilts stand out from the crowd! The edge of the quilt and binding strips can also be cut in any shape or size to create the perfect mitered corner. This blog post has helped teach you all about miter corner techniques and how to perfect them. So go ahead and try it – we know you’ll love the results!