Subscribe To Emails
Subscribe to the YourCotton mailing list to receive updates on new arrivals and promotions (about once every 6 weeks)!
Sewing a pillow can seem like an intimidating process for those who are just getting started. But in reality, it’s pretty easy! Whether you want to upgrade your bedroom décor or add some unique touches to your living room, sewing a custom pillow is the perfect way to spruce up any space with just a few simple tools.
With this step-by-step guide, you’ll learn how to sew a pillow within minutes. Let's get started!
Pillow-making starts with creating a DIY pillow form, typically done by sewing together two rectangular pieces of fabric, but you can make it any shape you like. Here’s a simple step-by-step on how to sew a pillow:
To get started on your pillow, you’ll need the following supplies:
- Two pieces of fabric in the size and style that you want for your pillow (we recommend using cotton or linen)
- Thread to match the color of your fabric
- A pair of scissors
- A ruler or measuring tape
- Pins
- An iron and ironing board (optional)
Using a ruler or measuring tape, measure two equal-sized pieces of fabric in the dimensions you want for your pillow. Then, with scissors, cut each piece along those measurements. You can iron the fabric pieces to get them nice and smooth.
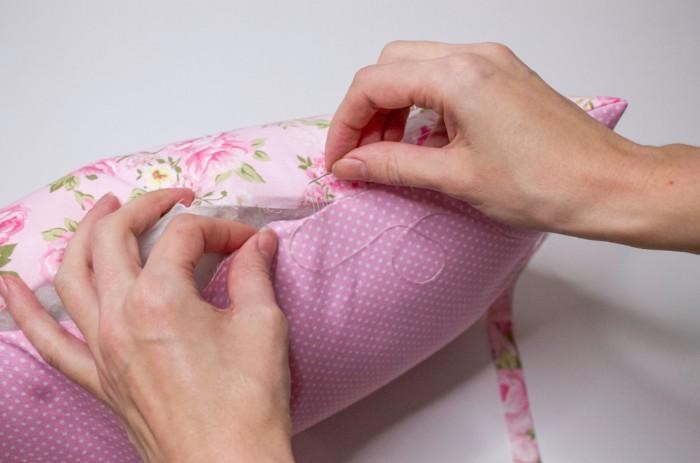
Now it’s time to join the two fabric pieces together! Lay one piece of fabric face up on a flat surface, then take the other fabric piece and lay it face down on top of it so that the wrong sides are together. Make sure that your raw edges line up nicely, then pin them in place with safety pins.
Using a sewing machine or hand stitching, sew around all four edges of your pillow. Leave a few inches open along one edge so you can turn your pillow right-side out later. Once finished, tie off all of your threads.
Carefully turn your pillow right-side out by pushing it through the opening you left along one edge. Then, use an iron to press your seams flat and give them a finished look. Pillow insert optional.
Now all that’s left is to stuff your pillow with whatever filling material you choose! You can find polyester fiberfill, feathers, cotton batting, or foam inserts in craft stores or online. Once stuffed, sew up the open edge and give your pillow a final press with an iron. And there you have it—a perfect homemade pillow!
When selecting a pillow's fabric, you should consider its properties and how it will fit into your home’s style. It is also important to consider the space where the pillow will live and research fabrics that are appropriate for the environment. Different fabrics have varied characteristics, so the right choice depends on your goal.
If you want a reliable all-around option, look for a high-quality cotton that stays cool and is hypoallergenic for quality sleep conditions. Look to add additional details like stitching that can help add a unique design to your pillow while still fitting your home’s decor.
Sewing a pillow is a simple and fulfilling project that doesn't require vast amounts of fabric. To make one, you will need just one to two yards of fabric, depending on the size of your pillow. For example, if you are making a standard 16”x16” pillow, you can use 1 yard of fabric, while for a 20”x20” pillow, it would be best to have 2 yards. If the fabric is printed or patterned, it would be better to lean more toward the 2-yard range for a complete pattern to show.
Ultimately, however much fabric you decide to work with should depend on how big of a pillow you want to make and how creative you want to get.
The best stitch for your pillow project will depend on the type of fabric and use of the pillow. For a lightweight cotton or linen fabric, a single stitch will be sufficient to keep the pillow intact if used as decorative only. However, if making a heavier fabric into a functional pillow cover such as an outdoor cushion, stitching with a French seam or zig-zag will provide extra strength and durability.
On curved edges like scallops, a zig-zag stitch offers greater flexibility than a traditional straight stitch. The overall look of any finished pillow depends on the careful selection of thread and color. Still, it is important to use the appropriate stitch for added security, comfort, and strength. Homemade pillows are a great way to add a touch of personality and style to any room!
Making a pillow can be time-consuming but rewarding in the end. To make the process more efficient, it is important to first measure and cut out fabric pieces according to the desired size of your pillow. This will allow you to have precise measurements that are easy to follow while sewing. Additionally, when pinning two fabric pieces together before stitching them into one piece, ironing them beforehand can save time and help create a finished look. Moreover, consider using pre-made pillow forms or stuffing for an easier way to fill your DIY pillows with fluffiness! Finally, adding zippers or buttons as decorations on pillows gives them an extra creative touch.
Sewing a pillow is an easy and enjoyable project that can be done in minutes. With this step-by-step guide, you’ll have your custom pillow ready before you know it. Remember to choose the right fabric for your desired style and measure carefully for accurate results -and don't forget to use the right stitch for extra durability!
Ready to get creative? YourCotton’s fun and expressive fabrics can help you sew a pillow that matches your home and gives you a soft place to rest your head, so choose a fabric that speaks to you and get sewing!